A guide to securing your WordPress website site
Part 2 of 3: cPanel, .htaccess and wp-config.php.
In part one we covered the basics that you can implement from the WordPress dashboard. We now have to turn up the heat and get our hand dirty with code. As more and more people are starting to release every business is becoming a software business.
For many small business owners, this may be an unwanted byproduct of operating a website web, but it’s something you need to face, if not embrace. You have a responsibility to yourself and to your business to keep your IT assets — your website, your intranet, you shared accounts and your social accounts — safe and secure.
And that means, if only for a short time, being a geek then hey. Welcome to our world. Work through the 7 tips below and your site will be more secure. Take a full site and database backup first.
WordPress security via cPanel
cPanel is the most common control panels or admin tools for your web hosting environment. (There are others, too.) You’ll have been given a login name and password to access your site’s control panel by your web host. More than likely you’ll find your control panel at http://yoursitename.co.uk/cpanel.
Login to your control panel and navigate to your WordPress files using the built-in file manager. They will most like reside in a folder called ‘public_html’. Note that there’s no folder called ‘WordPress’ as such; if you’ve installed WordPress in its default location, there will be a bunch of files within ‘public_html’, some of which relate to your WordPress installation and some of which don’t, and three folders called ‘wp-admin’, ‘wp-includes’ and ‘wp-content’. In a typical install, the ‘public_html’ folder is your WordPress ‘root’ folder.
TAKE NOTE
WE’RE GOING TO BE EDITING SOME FILES THAT ARE CRITICAL TO THE CORRECT FUNCTIONING OF WORDPRESS. IT’S ESSENTIAL TO SAVE A COPY TO YOUR DESKTOP OR WORK FOLDER BEFORE EDITING THESE FILES SO THAT IF SOMETHING GOES WRONG YOU CAN RESTORE THE SYSTEM BY RE-UPLOADING THESE FILES. IF THAT MAKES YOU NERVOUS, IT MAY BE A GOOD IDEA TO GET SOMEONE EXPERIENCED TO DO THIS ON YOUR BEHALF. IF YOU PROCEED, DO NOT USE MICROSOFT WORD AS A TEXT EDITOR; USE CPANEL’S BUILT-IN CODE EDITOR, OR A PURE TEXT EDITOR SUCH AS SUBLIME …
1: Install security and salt keys
If you’re running a reasonably recent version of WordPress, chances are that these have been installed by default, but it’s a good idea to check, and if necessary, change them. The keys improve encryption of the information that is stored in a visitor’s cookies. The keys also make it harder to crack your password as it adds random elements to them (don’t worry, you don’t have to remember any of this). So…
Locate the file called wp-config.php. Open it using the control panel’s text or code editor. Check for the following sequence:
define(‘AUTH_KEY’, ‘put your unique phrase here’);
define(‘SECURE_AUTH_KEY’, ‘put your unique phrase here’);
define(‘LOGGED_IN_KEY’, ‘put your unique phrase here’);
define(‘NONCE_KEY’, ‘put your unique phrase here’);
define(‘AUTH_SALT’, ‘put your unique phrase here’);
define(‘SECURE_AUTH_SALT’, ‘put your unique phrase here’);
define(‘LOGGED_IN_SALT’, ‘put your unique phrase here’);
define(‘NONCE_SALT’, ‘put your unique phrase here’);
If your records here contain the phrase ‘put your unique phrase here’ or if they simply don’t exist, you need to edit or add them. Take a trip over to the WordPress Salt Keys Generator; you end up with something like this:
define('AUTH_KEY',         '/u$,6-%rxyP<YK,X)J$gwXSwi;Ty>a+pw/z[(ZoXmZ9syjcn 4|j:lt0=imuhh9o');
define('SECURE_AUTH_KEY',  'M?-zmam2Wla-Wve|fEbrZoT9~wLFm[f|sRdVtHMfM=4K6$3 R$kGJ((}!nv|q/~)');
define('LOGGED_IN_KEY',    '1P7bltw1|k/ix<rozs1vlp(z v!|:(gl^wp3l]dp(|j-us<="" fu;cwk8');="" define('nonce_key',="" 'if*ux@?)6k="" p`="" w${vo]jw?%="" 0qr="`36+V;W:QwD@ck5+" o[v_chr11|x+b[n$b9');="" define('auth_salt',="" 'b#x%[v$*sg+aoix?cj5s|n@lsv+uv5nzoz[[|*f@bcg6396="N.Qk<6iE^g}Or2++');" define('secure_auth_salt',="" '^hm-:7rtgk-;u+^(|goqn)l="i&$HCA5=kq@G}idwDCbZt=" 2px&$;nnxx`&r192k');="" define('logged_in_salt',="" '{t:,-i-:om0p2aijoanfztsy,t76g+*to)twyc-i76="}?X.Xm+Cxc#_">bHq__KSX');
define('NONCE_SALT',       '*52g$ZF|u;KPN]?+Mmw{/TC/|,G~X><enc;keidv8n*oxep|>)t=Z4%<+5k;S5$P');
Replace the un-keyed block with the new block of keyed code, such as the one above, in your wp-config.php file.
Note
DON’T USE THE CODES HERE: THEY’RE JUST AN EXAMPLE. GET YOUR OWN UNIQUE KEYS FROM THE WORDPRESS SALT KEYS GENERATOR.
2: Change the table prefix of your WordPress database tables
By default, each of the tables in your WordPress database (where all you content and information is stored) is preceded by the prefix, ‘wp_’, so your tables are named ‘wp_posts’, wp_users’, ‘wp_terms’ and so on.
As with the default ‘admin’ username, hackers know these defaults and target them because it takes one more variable out of the hacking equation. If you change the prefix, hackers have to guess it, which can go a long way to their giving up.
Don’t pass this one by: targeting your WordPress database is a major threat for SQL Injection vulnerabilities (I won’t go into the details here; suffice it to say it’s scary stuff), and potentially gives hackers access to your database. Once they’ve got access to your WordPress database, they can do pretty much whatever they want.
Changing the prefix of your database tables requires changing your wp-config.php file, and changing all your tables through a database utility such as phpMyAdmin. If you don’t feel confident with either of these steps, ask someone for help.
WordPress Database is like a brain for your entire WordPress site because every single information is stored in there thus making it hacker’s prime target. Spammers and hackers run automated codes for SQL injections. Well, unfortunately many people forget to change the database prefix while they install WordPress. This makes it easier for hackers to plan a mass attack by targeting the default prefixwp_. The smartest way you can protect your database is by changing the database prefix which is really easy to do on a site that you are setting up. But it takes a few steps to change the WordPress database prefix properly for your established site without completely messing it up.
Preparation
We recommend that you backup your WordPress Database before you perform anything suggested in this tutorial. It is important to keep daily backups of your site, we recommend BackupBuddy plugin for doing that. Next thing we recommend is that you redirect your visitors to a temporary maintenance page.
Change Table Prefix in wp-config.php
Open your wp-config.php file which is located in your WordPress root directory. Change the table prefix line from wp_ to something else like this wp_bc97891l_
So the line would look like this:
| 1 | $table_prefix = ‘wp_bc97891l_’; |
Note: You can only change it to numbers, letters, and underscores.
Change all Database Tables Name
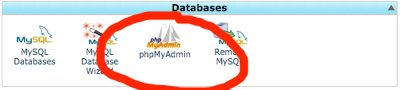
You need to access your database (most likely through phpMyAdmin), and then change the table names to the one we specified in wp-config.php file. If you are using the cPanel WordPress hosting, then you can find the phpMyAdmin link in your cPanel. Look at the image below:
There are a total of 11 default WordPress tables, so changing them manually would be pain. Add plugins and your will have more.
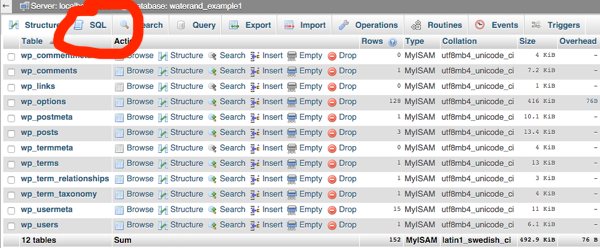
That’s why to make things faster, we have a SQL query that you can use.
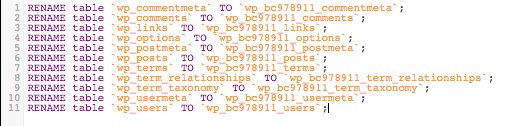
| RENAME table `wp_commentmeta` TO `wp_bc978911_commentmeta`; | |
| RENAME table `wp_comments` TO `wp_bc978911_comments`; | |
| RENAME table `wp_links` TO `wp_bc978911_links`; | |
| RENAME table `wp_options` TO `wp_bc978911_options`; | |
| RENAME table `wp_postmeta` TO `wp_bc978911_postmeta`; | |
| RENAME table `wp_posts` TO `wp_bc978911_posts`; | |
| RENAME table `wp_terms` TO `wp_bc978911_terms`; | |
| RENAME table `wp_term_relationships` TO `wp_bc978911_term_relationships`; | |
| RENAME table `wp_term_taxonomy` TO `wp_bc978911_term_taxonomy`; | |
| RENAME table `wp_usermeta` TO `wp_bc978911_usermeta`; | |
| RENAME table `wp_usermeta` TO `wp_bc978911_usermeta`; | |
| RENAME table `wp_users` TO `wp_bc978911_users`; |
You may have to add lines for other plugins that may add their own tables in the WordPress database. The idea is that you change all tables prefix to the one that you want.
The Options Table
We need to search the options table for any other fields that is using wp_ as a prefix, so we can replace them. To ease up the process, use this query:
| 1 | SELECT * FROM `wp_a123456_options` WHERE `option_name` LIKE’%wp_%’ |
This will return a lot of results, and you need to go one by one to change these lines.
UserMeta Table
Next, we need to search the usermeta for all fields that is using wp_ as a prefix, so we can replace it. Use this SQL query for that:
| 1 | SELECT * FROM `wp_a123456_usermeta` WHERE `meta_key` LIKE’%wp_%’ |
Number of entries may vary on how many plugins you are using and such. Just change everything that has wp_ to the new prefix.
Backup and Done
You are now ready to test the site. If you followed the above steps, then everything should be working fine. Now, you should make a new backup of your database just to be on the safe side.
3: Keep WordPress updated — automatically
Every new release of WordPress addresses security issues that may have become apparent in the previous version. If you don’t keep WordPress up-to-date, you are more susceptible to attack because older versions don’t have all the latest security updates.
Since version 3.7, WordPress has had a feature that automatically updates WordPress in the background; however, this only applies to minor updates, not major ones. (Major updates are released roughly twice a year and are signified by incrementing the version number by 0.1; minor updates increment by 0.01. So a major update would be 3.9, 4.0 and 4.1, whereas a minor update would be 4.11, 4.12 and so on.)
Current release at time of penning December 2015 is Version 4.4
To enable major updates as well as minor updates automatically, add the following to your wp-config.php file:
define( ‘WP_AUTO_UPDATE_CORE’, true);
Take note
BE AWARE THAT THERE IS A RISK THAT YOUR WEBSITE WILL ‘BREAK’ OR BECOME IN SOME WAY UNFUNCTIONAL FOLLOWING A MAJOR UPDATE. THIS IS MORE LIKELY IF YOUR PLUGINS ARE NOT ACTIVELY UPDATED ALONG WITH THE WORDPRESS CORE. FOR THIS REASON, YOU MAY NOT WANT TO ENABLE THIS FUNCTION. IF YOU CHOOSE NOT TO UPDATE AUTOMATICALLY, YOU SHOULD KEEP A REGULAR EYE ON WHAT UPDATES ARE AVAILABLE AND INSTALL THEM MANUALLY.
Disable the theme and plugin editor
WordPress has a built-in facility to edit your theme and plugin files. This is great if you’re a developer; pretty pointless if you’re not.
Further, if a hacker manages to get into your site, they can do a lot of damage, very quickly, if they have access to this editor. It makes sense, then, to simply disable it.
Add the following code to your wp-config.php file:
define ( ‘DISALLOW_FILE_EDIT’, true);
Use correct file permissions
It is important that file permissions are configured correctly. Having a directory erroneously set to 777 (a permissions designation) could allow a malicious party to upload a file or modify an existing file.
According to WordPress, you should use the following permissions on your website:
All directories should be set to 755 or 750;
All files should be set to 644 or 649;
wp-config.php should be set to 600.
There is a files permission editor within cPanel. Use the File Manager to view your files, select a file or directory and click the Permissions button. Change as necessary. Be careful!
4: Edit .htaccess
Your .htaccess file is an important file that controls redirects and permalinks, among much else. It can be used to beef up the security of your WordPress site.
If you cannot see your .htaccess file within cPanel’s make sure you have the View Invisible Files option turned on.
Caution
IN ALL INSTANCES OF THE FOLLOWING EDITS TO YOUR .HTACCESS FILE, PLACE ANY CODE OUTSIDE OF THE #BEGIN WORDPRESS AND #END WORDPRESS TAGS. AND DON’T FORGET TO DOWNLOAD A COPY OF YOUR CURRENT .HTACCESS FILE BEFORE YOU START.
5: Protect wp-config.php
As we’ve seen above, there’s a lot you can do with your wp-config.php file to protect your site; likewise, there’s a lot that hackers can do if they get access to it. To protect it, add the following snippet to your .htaccess file:
<files wp-config.php>
order allow,deny
deny from all
</files>
6: Protect the wp-includes directory
The wp-includes directory contains a lot of important files required to run WordPress. There really is no need for a visitor to be able to view this directory. To protect it, add the following snippet to .htaccess:
<IfModule mod_rewrite.c>
RewriteEngine On
RewriteBase /
RewriteRule ^wp-admin/includes/ – [F,L]
RewriteRule !^wp-includes/ – [S=3]
RewriteRule ^wp-includes/[^/]+.php$ – [F,L]
RewriteRule ^wp-includes/js/tinymce/langs/.+.php – [F,L]
RewriteRule ^wp-includes/theme-compat/ – [F,L]
</IfModule>
7: Protect the .htaccess file itself
Add the following snippet to .htaccess:
<Files .htaccess>
order allow,deny
deny from all
</Files>
Okay, that’s enough of the propellor head stuff. There’s a lot more you can do with .htaccess but it’s getting beyond the scope of what was supposed to be a quick intro to security for WordPress. If you want to know more, there’s plenty more on the wordpress.org website.
About us and this blog
We are a digital marketing company with a focus on helping our customers achieve great results across several key areas.
Request a free quote
We offer professional SEO services that help websites increase their organic search score drastically in order to compete for the highest rankings even when it comes to highly competitive keywords.
Subscribe to our newsletter!
More from our blog
See all posts